Project
In ABC User Feedback, a project is the most basic unit for collecting and analyzing feedback. This document covers features from project creation to team management and permission settings.
Project Overview
Projects have the following hierarchical structure:
Tenant
 └── Project (multiple allowed)
     ├── Channel (multiple allowed)
     ├── Members and Roles
     ├── Issue Tracker Integration
     ├── Webhook Integration
     ├── AI Features
     └── API Keys
Each project is a management unit that includes multiple channels, and can independently set and operate team members, roles, issue tracker integration, external system integration, etc.
Creating a Project
Access Permissions
Only Super users can create projects. Regular users can participate by being invited as members to existing projects.
If you need Super user permissions, please contact your system administrator.
Access Method
There are two ways to create a new project:
- First login: The project creation wizard automatically starts
- Additional projects: Click the Create Project button at the top of the left sidebar
Step 1: Project Basic Information
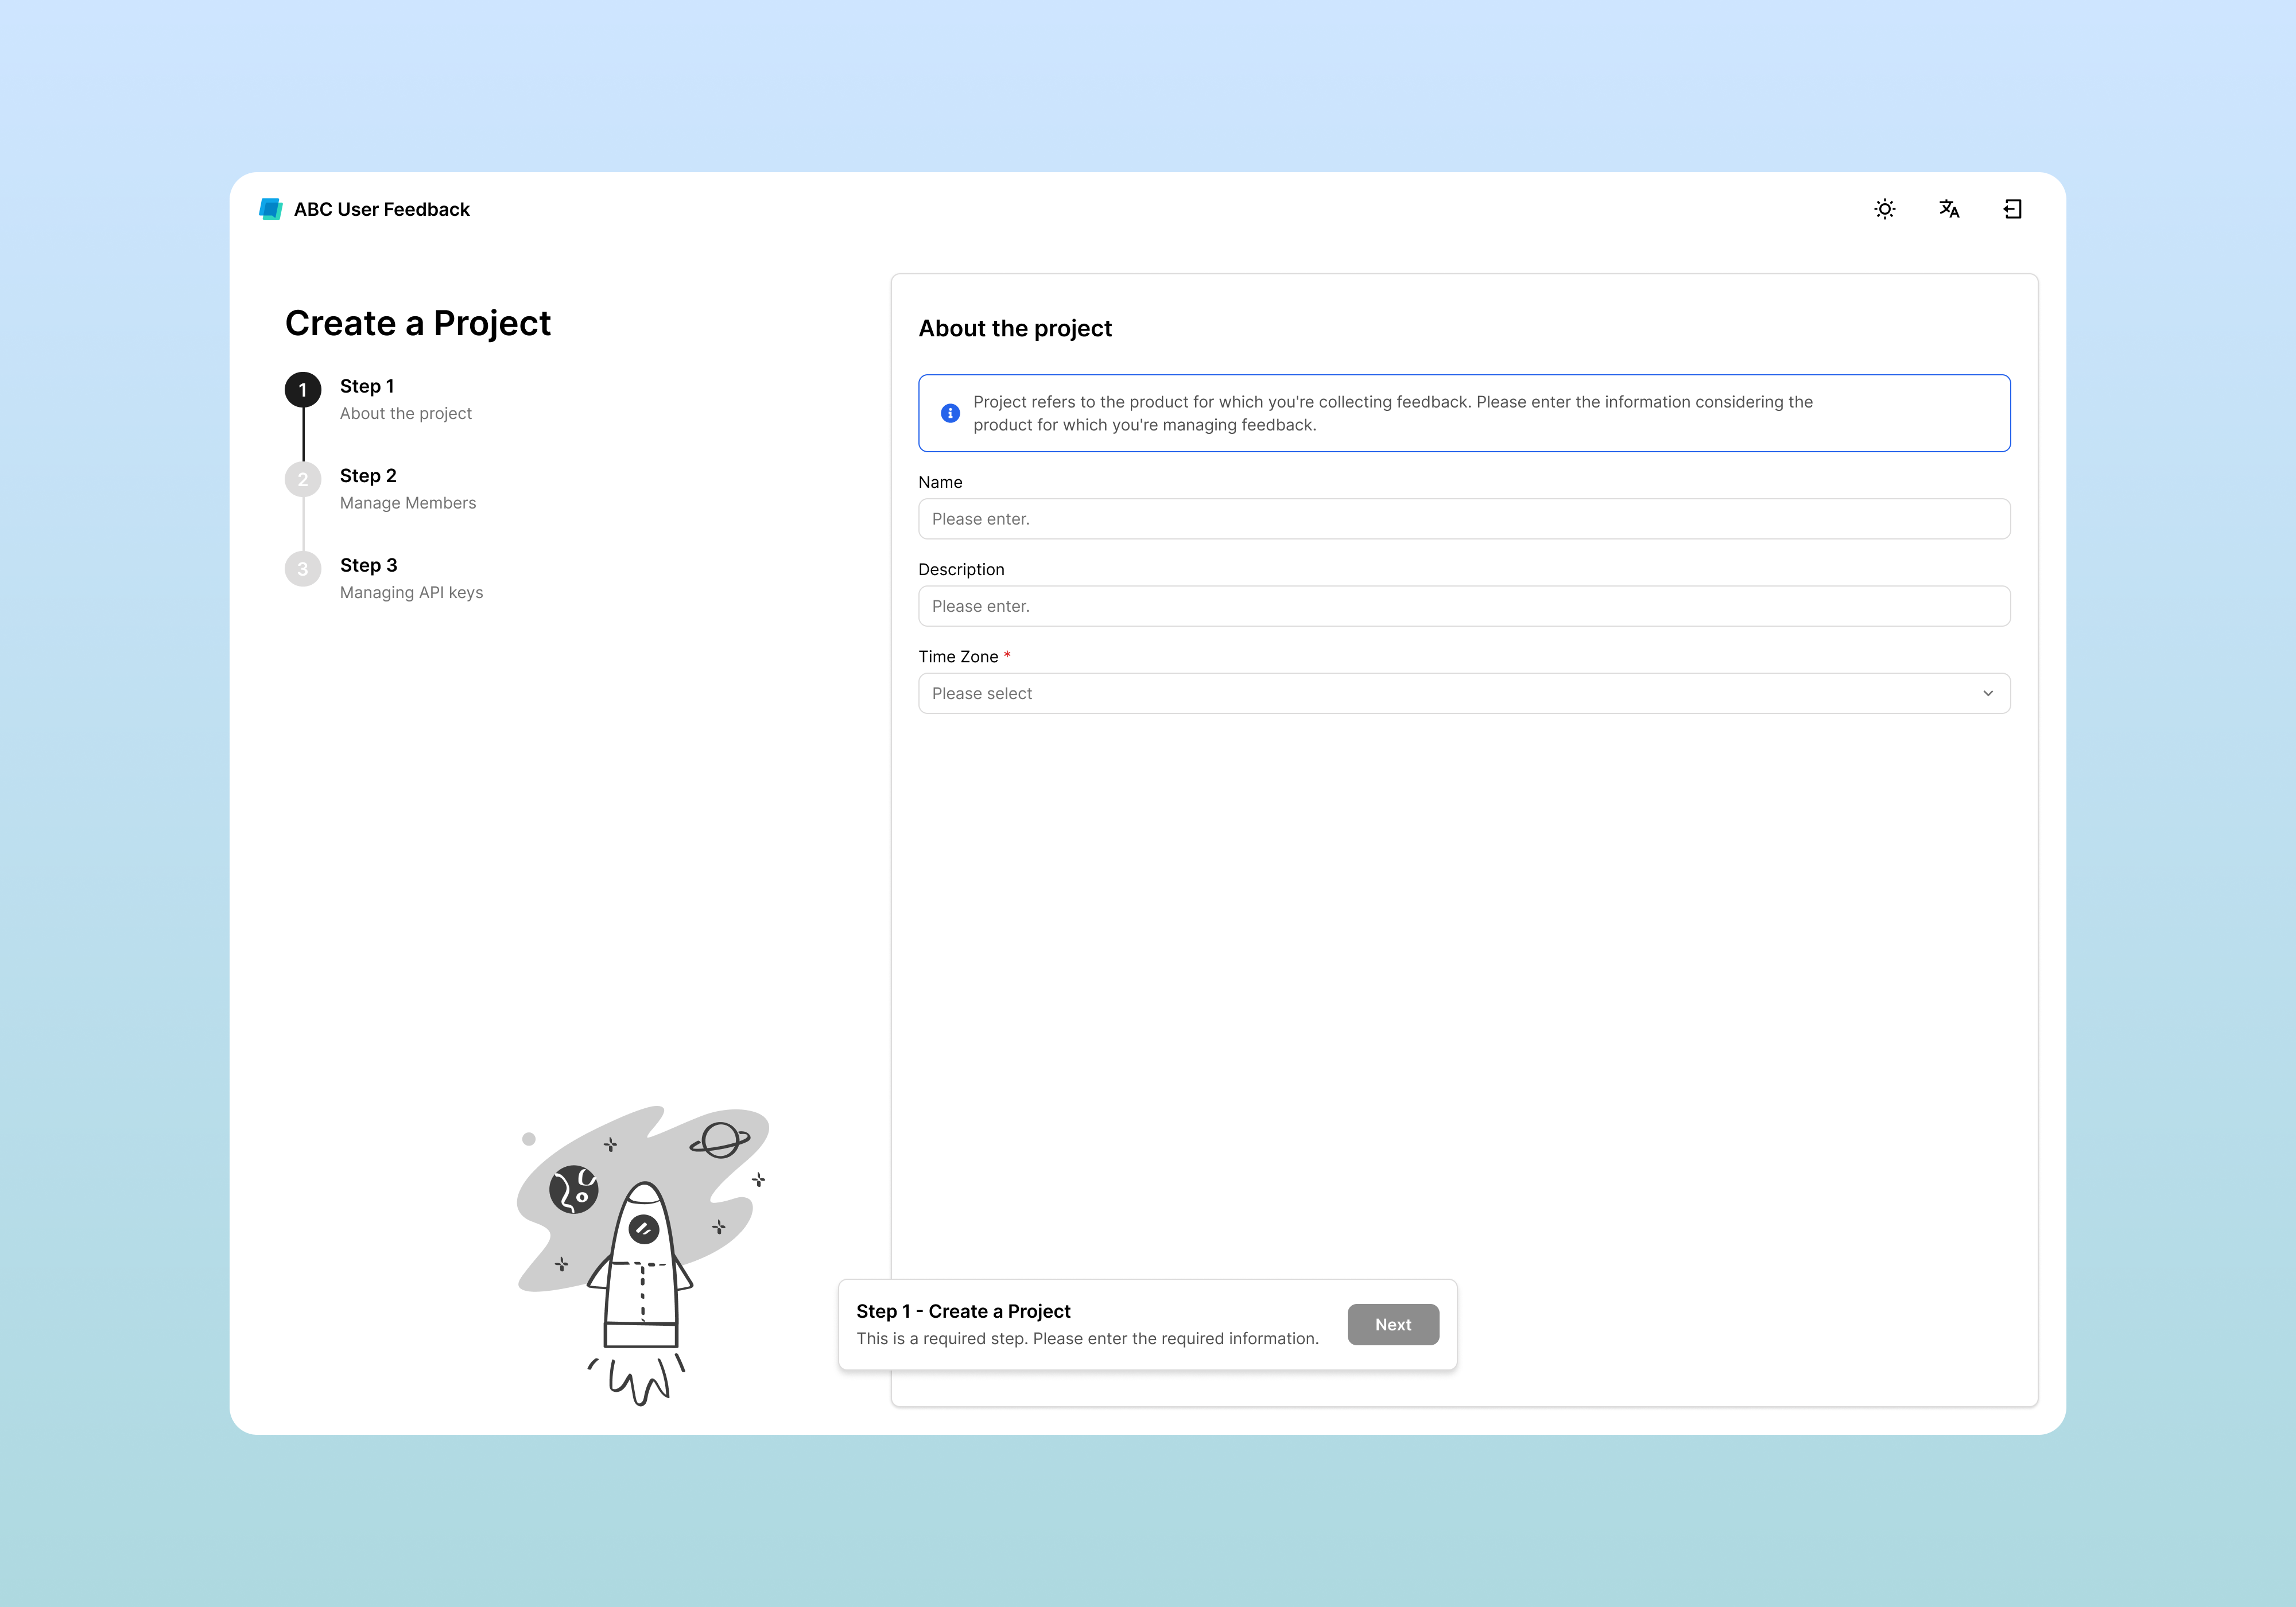
When creating a project, enter the following information:
| Item | Description | Example |
|---|---|---|
| Name | Project name (required) | Mobile App, Customer Service, Beta Service |
| Description | Brief description (optional) | iOS/Android app user feedback collection |
| Time Zone | Used as the time reference for feedback and reports (required) | Asia/Seoul |
The time zone affects dashboard statistics.
After completion: After entering all information, click the Next button.
Step 2: Add Team Members (Optional)

This step can be skipped. You can add members later from the project settings at any time.
Adding Members
- Click the Register Member button at the top right
- Enter the following items:
- Email: Select a user registered in the system
- Role: Choose from Admin, Editor, or Viewer
If you want to use custom roles, click the Role Management button for additional settings.
After completion: Check the member list and click Next.
Step 3: Generate API Key (Optional)
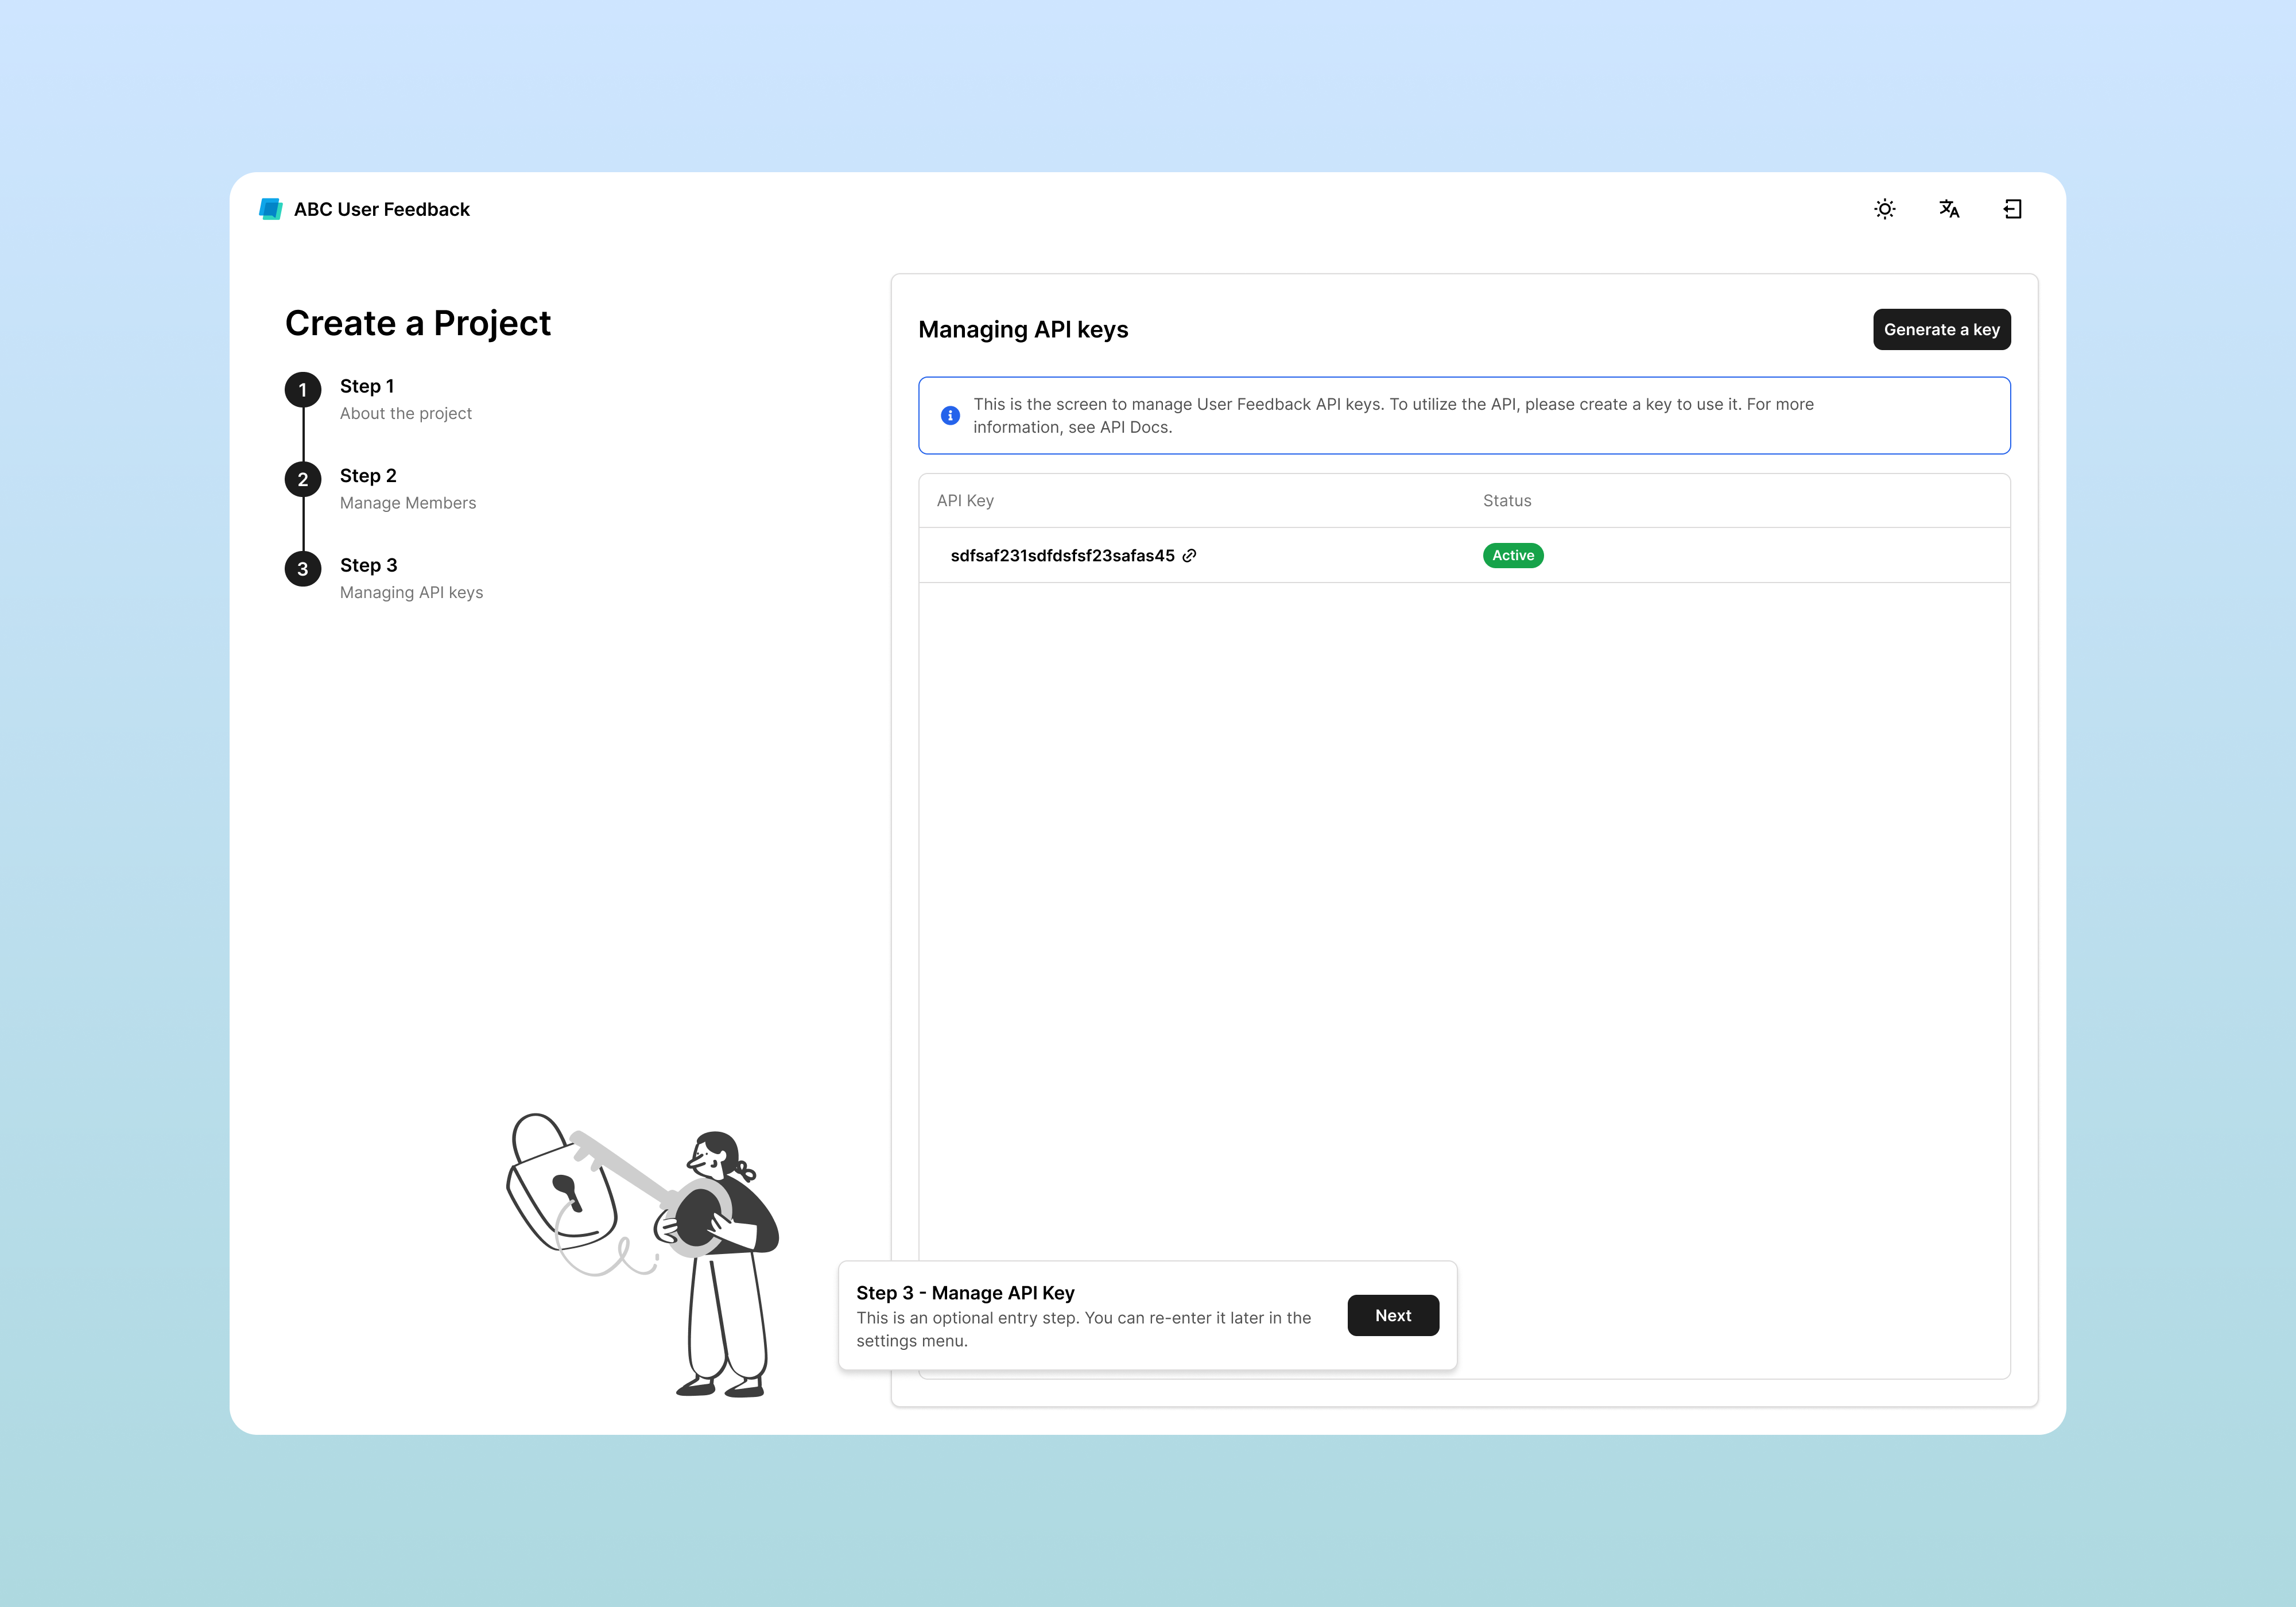
API keys are used when collecting feedback from external systems. You can generate them later from the settings menu, so you can skip this step now.
Key Generation Method
- Click the Create API Key button at the top right
- The key is automatically generated and displayed in the list
- Copy the generated key and store it in a safe place
Project Creation Complete
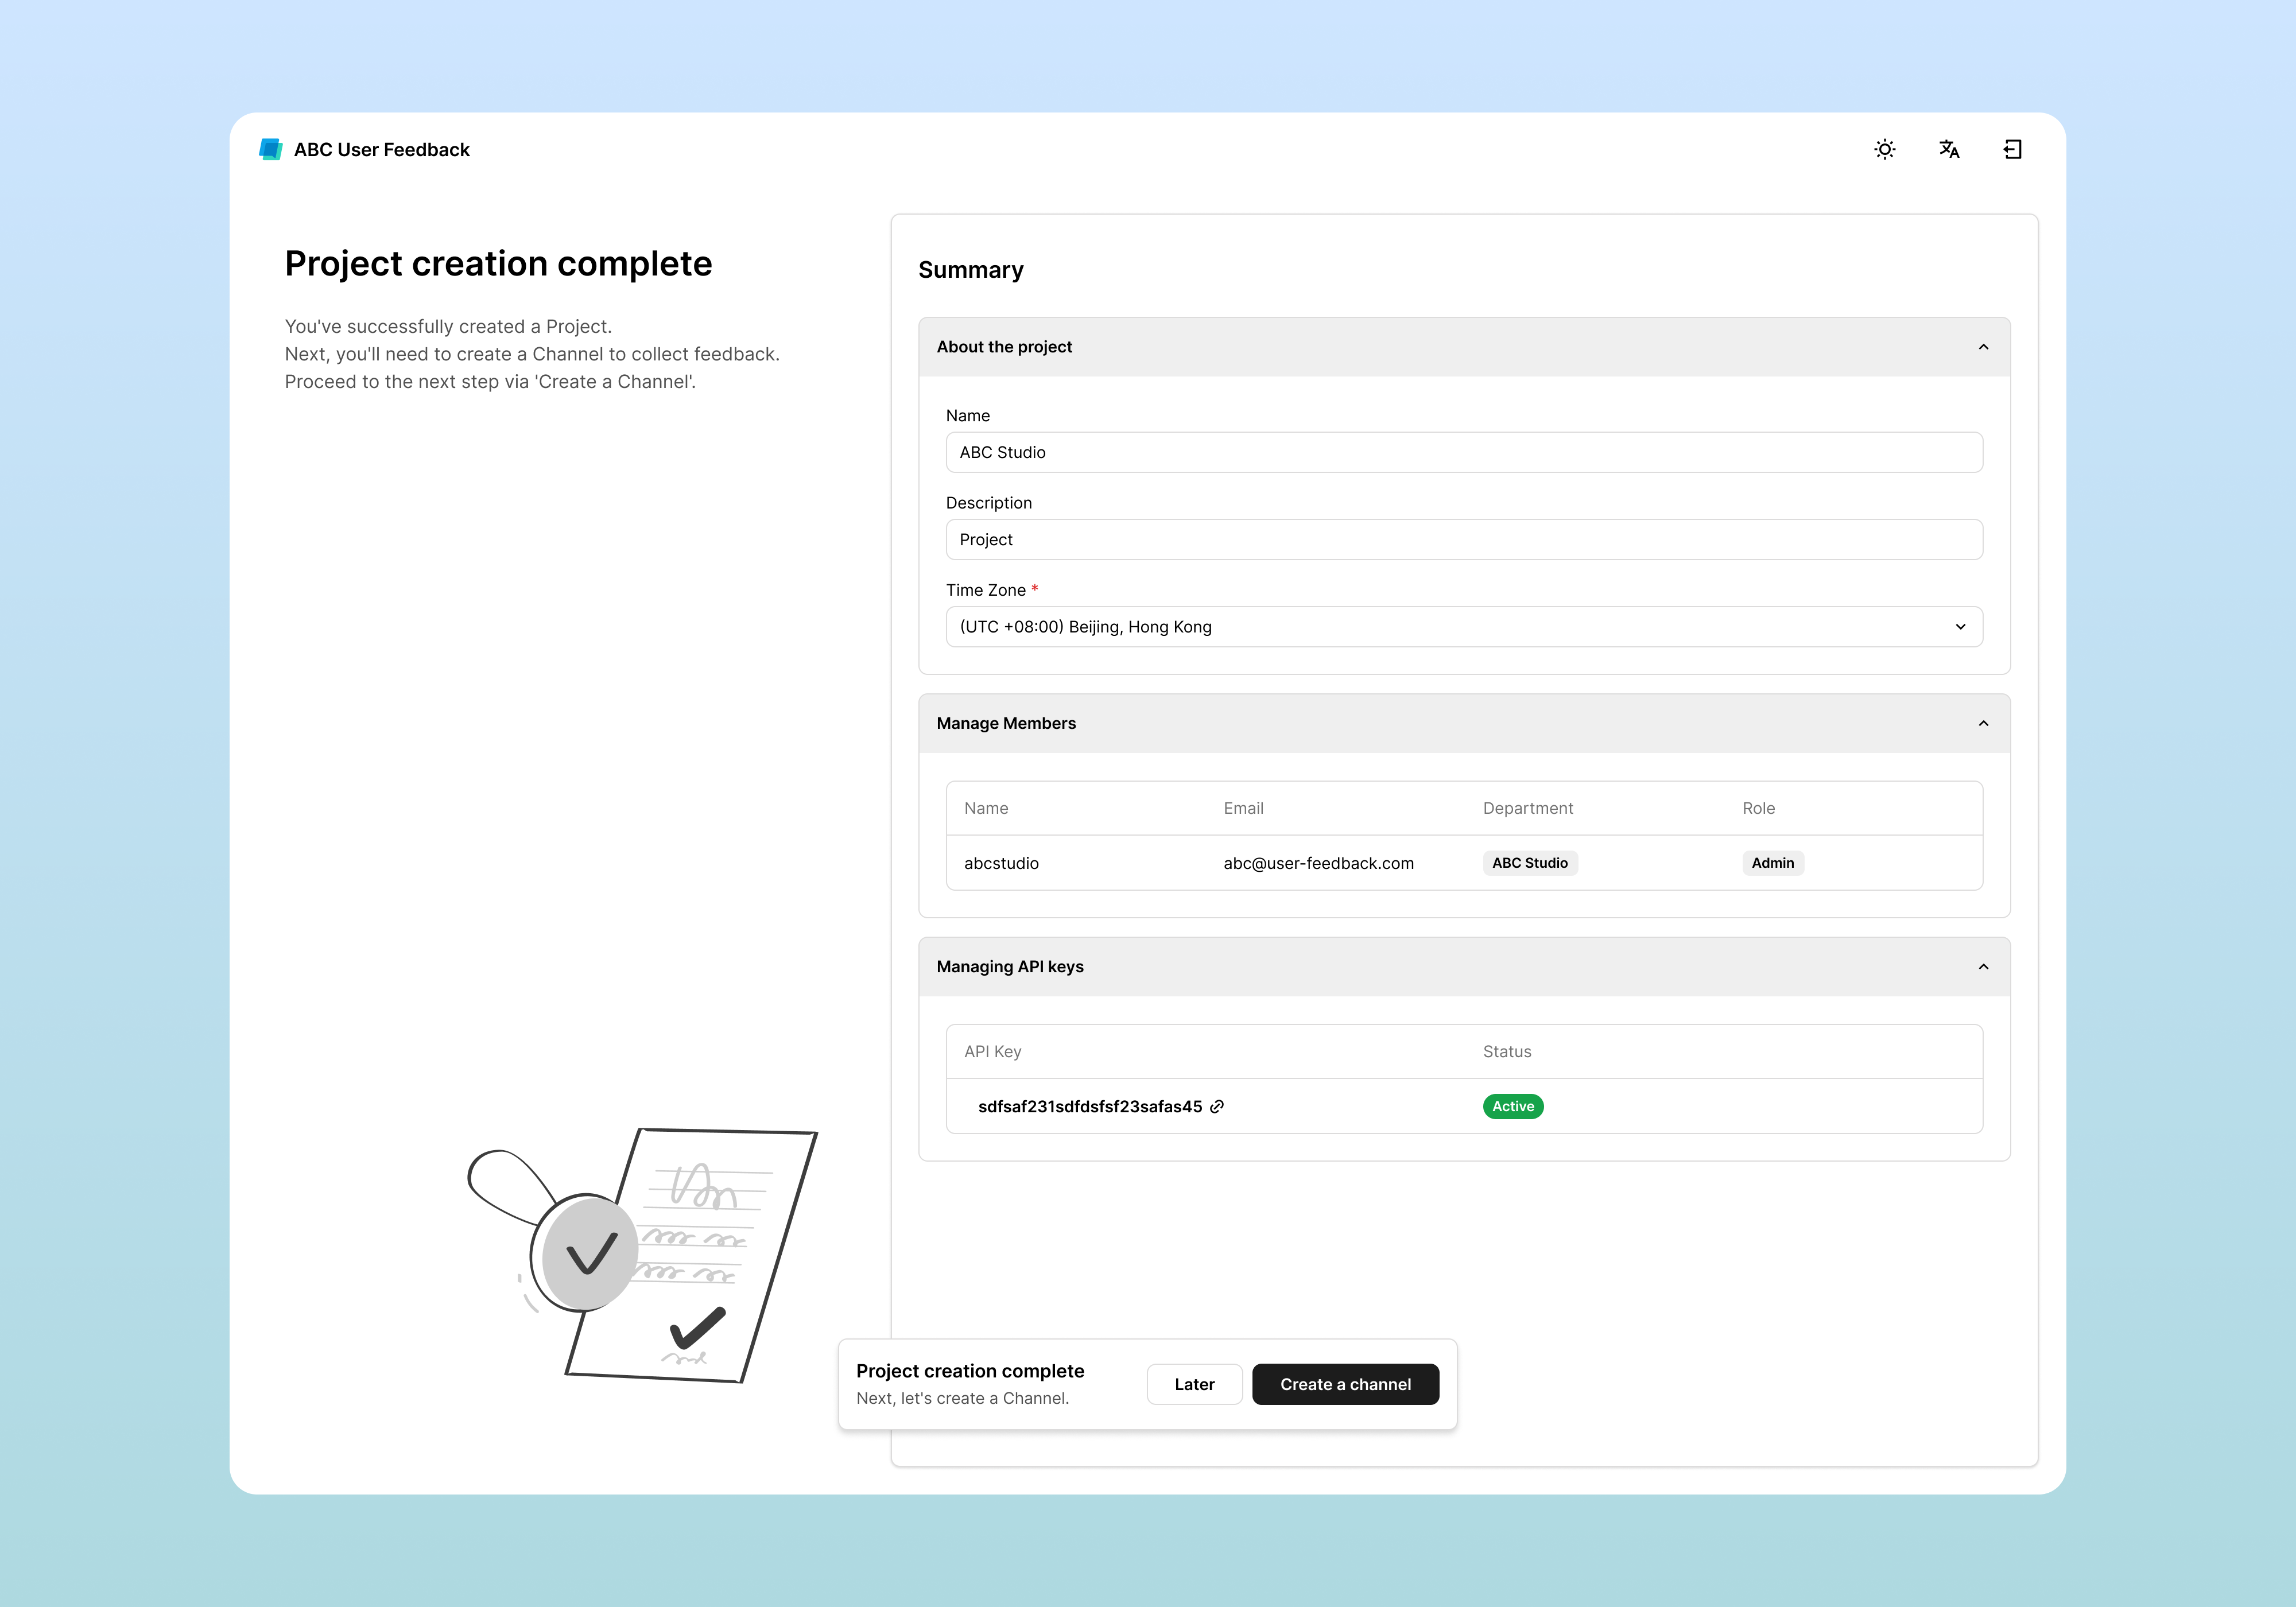
After completing all steps, a summary screen appears:
- Project information: name, description, time zone
- Member list
- Generated API keys
- Role settings status
Next Steps
- To immediately create a channel and start collecting feedback, click the Create Channel button
- Or click the Later button to create it later
Managing Project Settings
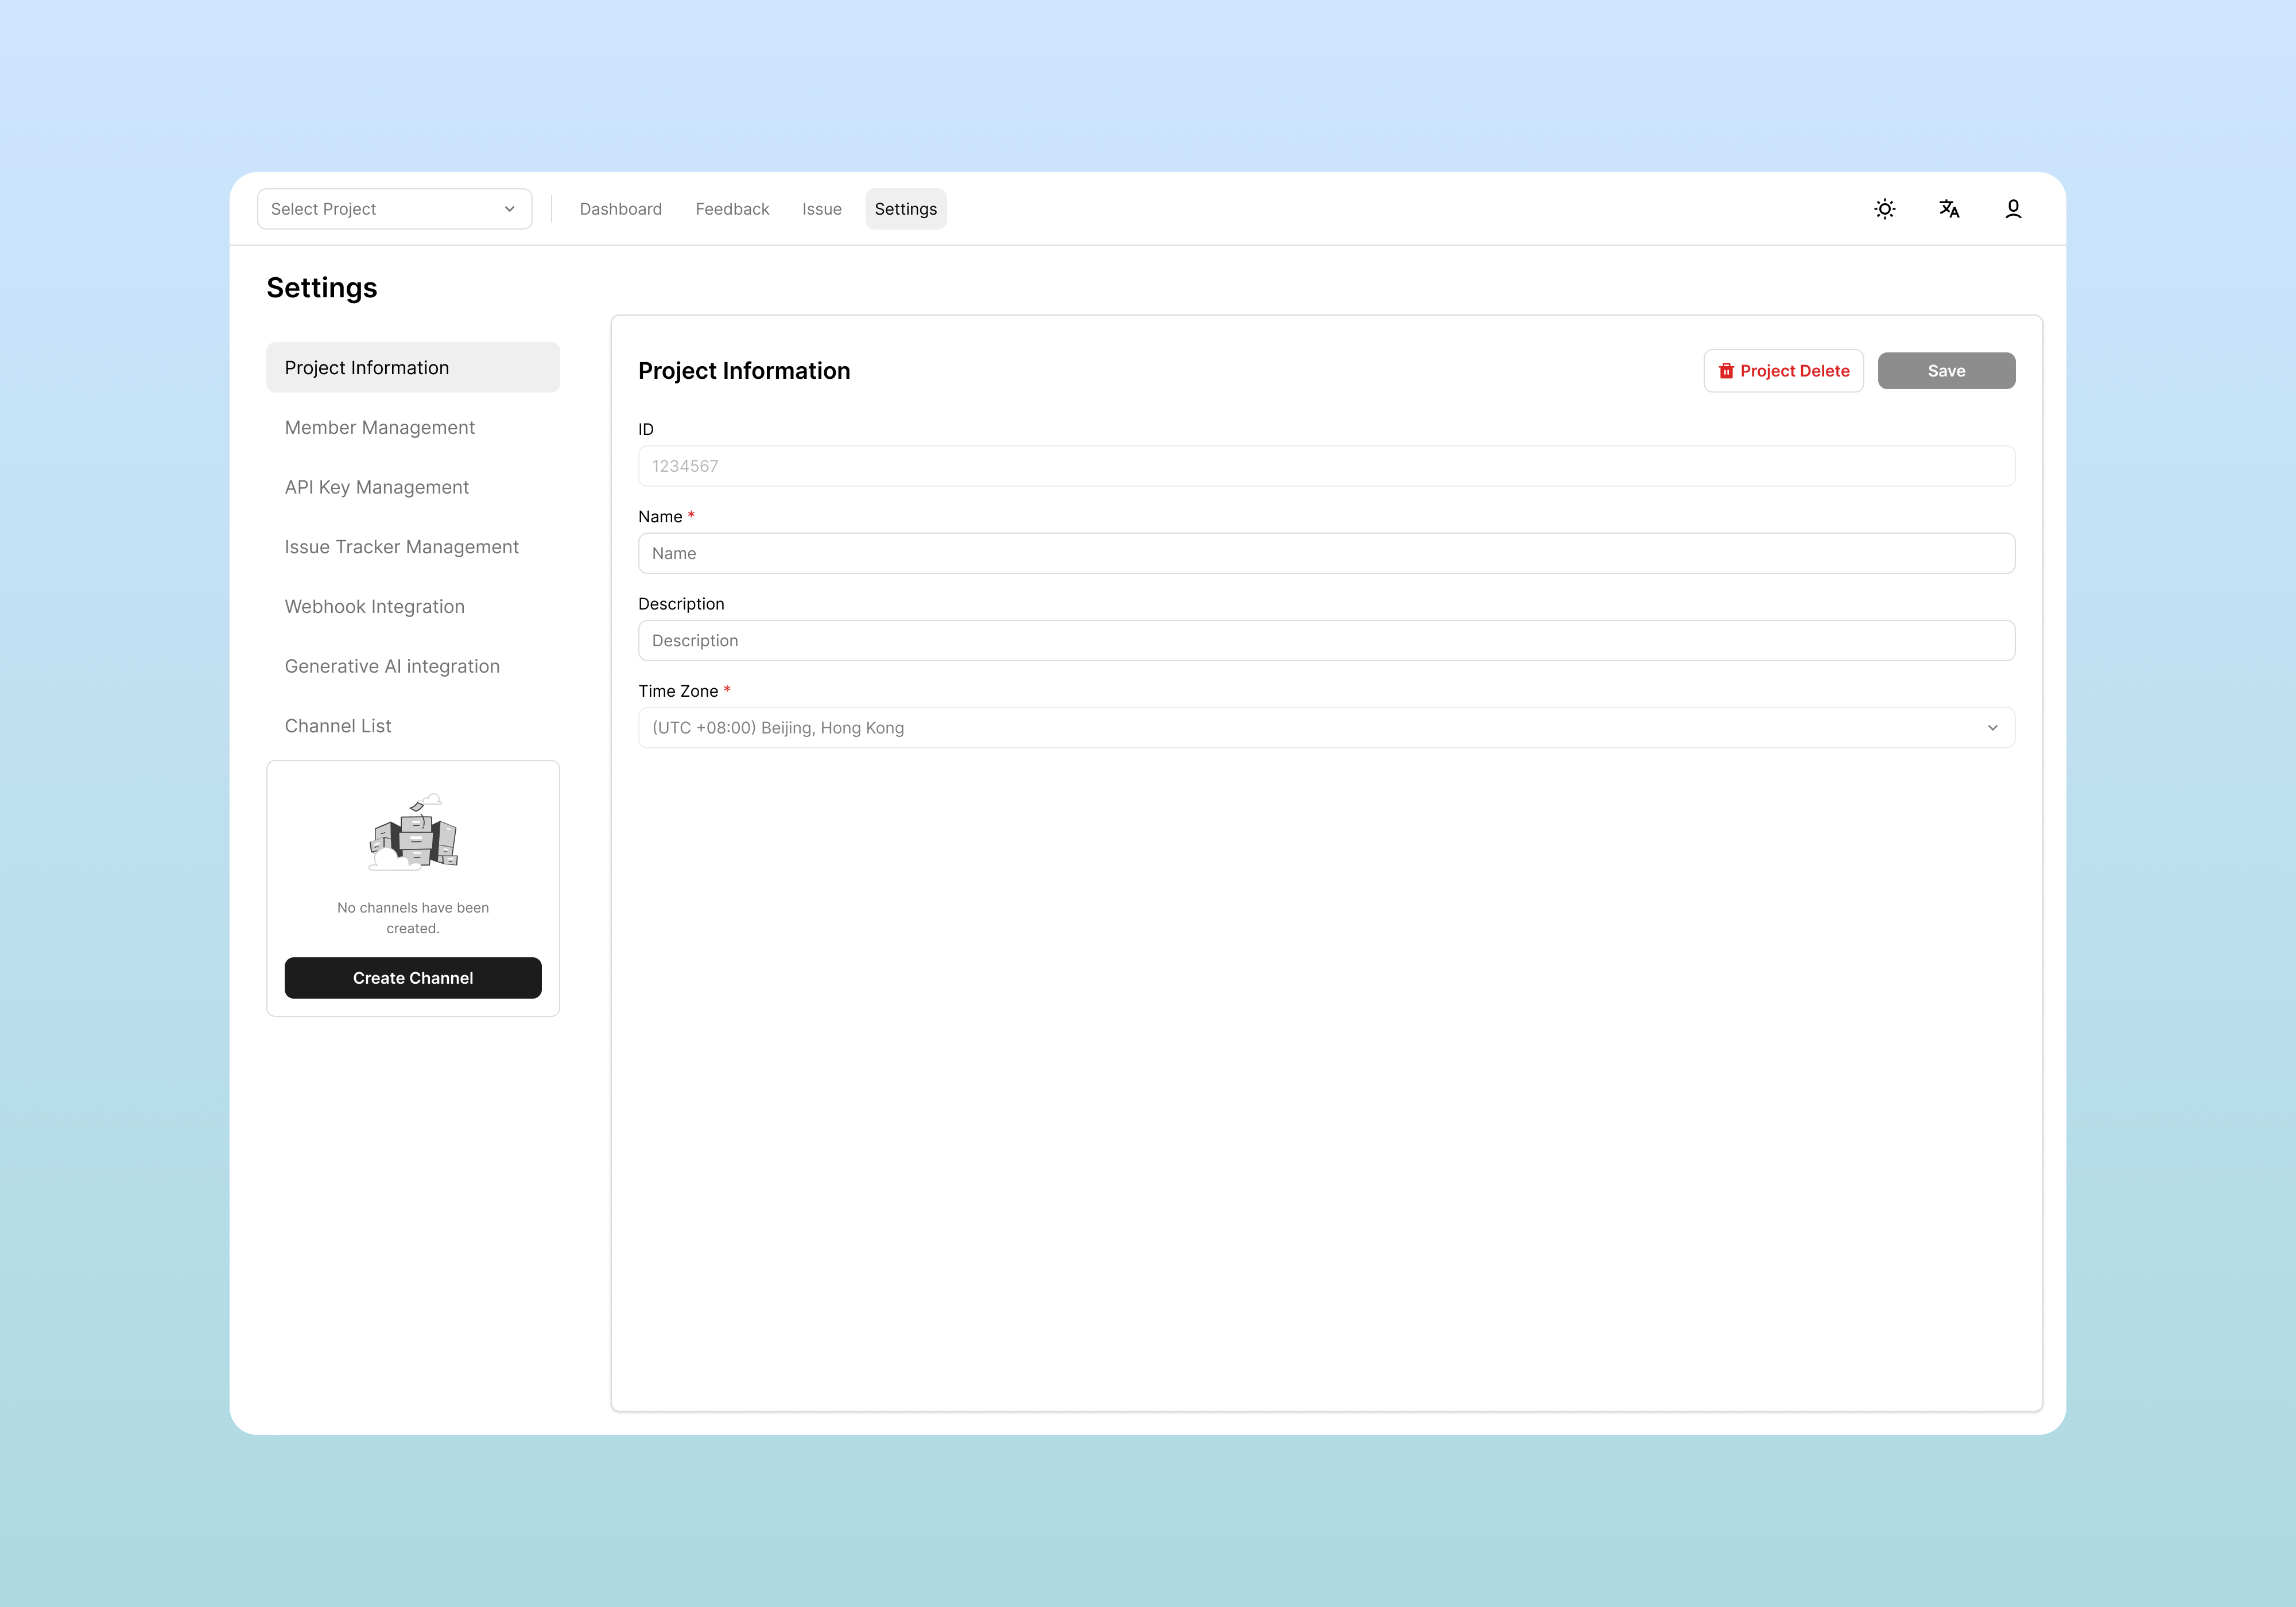
Access Method
To change project settings:
- Click Settings in the top menu
- Select Project Setting from the left menu
Editing Basic Information
You can modify the following items at any time:
| Item | Description | Notes |
|---|---|---|
| Name | Project name | Name displayed to team members |
| Description | Description (optional) | Purpose of the project |
| Time Zone | Time reference for statistics and time-related data | Changes do not affect existing data |
Save method: After making changes, click the Save button at the top right.
Notes on Time Zone Changes
- Does not affect the time information of existing feedback/issues
- Data inconsistencies may occur in dashboard statistics after changes.
Deleting a Project
Deletion Procedure
To completely delete a project:
- Click the Delete Project button at the bottom of the Project Setting screen
- Enter the project name exactly in the confirmation popup
- Click the Delete button to finalize
Deletion Notes
- All feedback, issues, and settings within the project will be permanently deleted
- Cannot be undone, so backup or export is recommended beforehand
- Connected channels and API keys are also removed upon deletion
Member Management
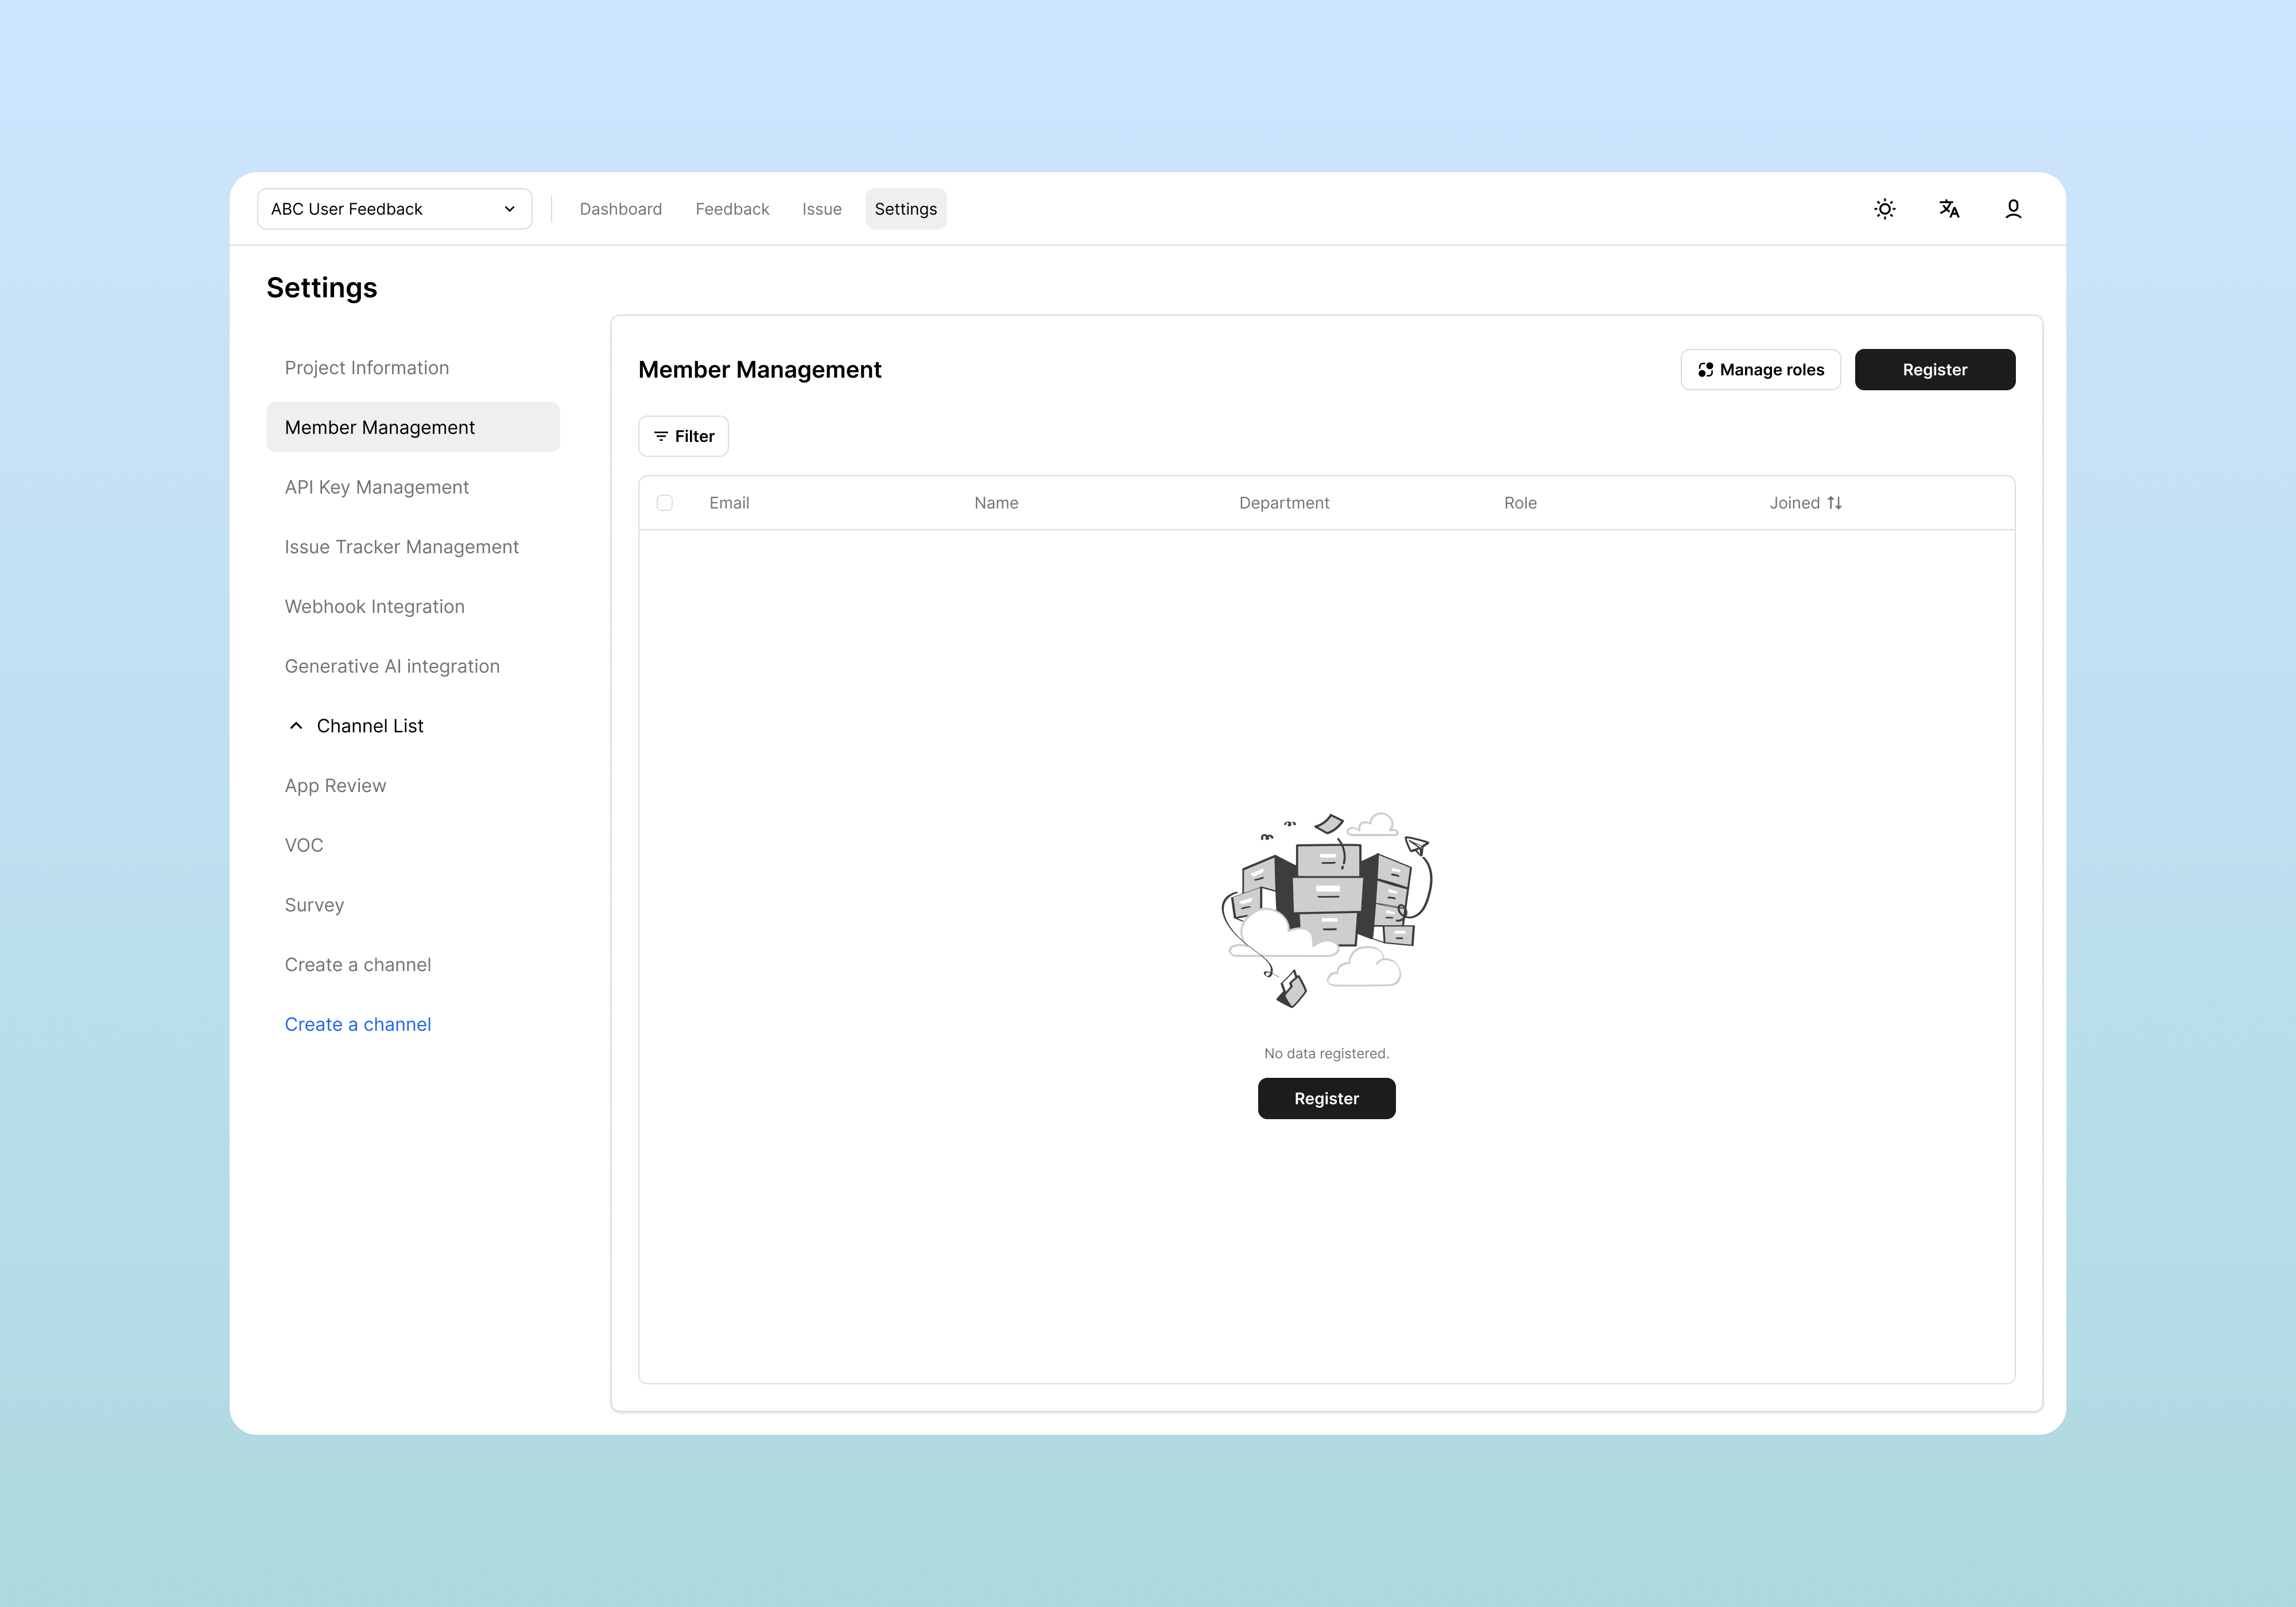
Viewing Member List
To view members currently participating in the project:
- Click Settings in the top menu
- Select Member Management from the left menu
The member list displays the following information:
| Item | Description |
|---|---|
| Account email | |
| Name | User name (from profile) |
| Department | Department |
| Role | Role within the project |
| Joined | Project participation date |
Inviting New
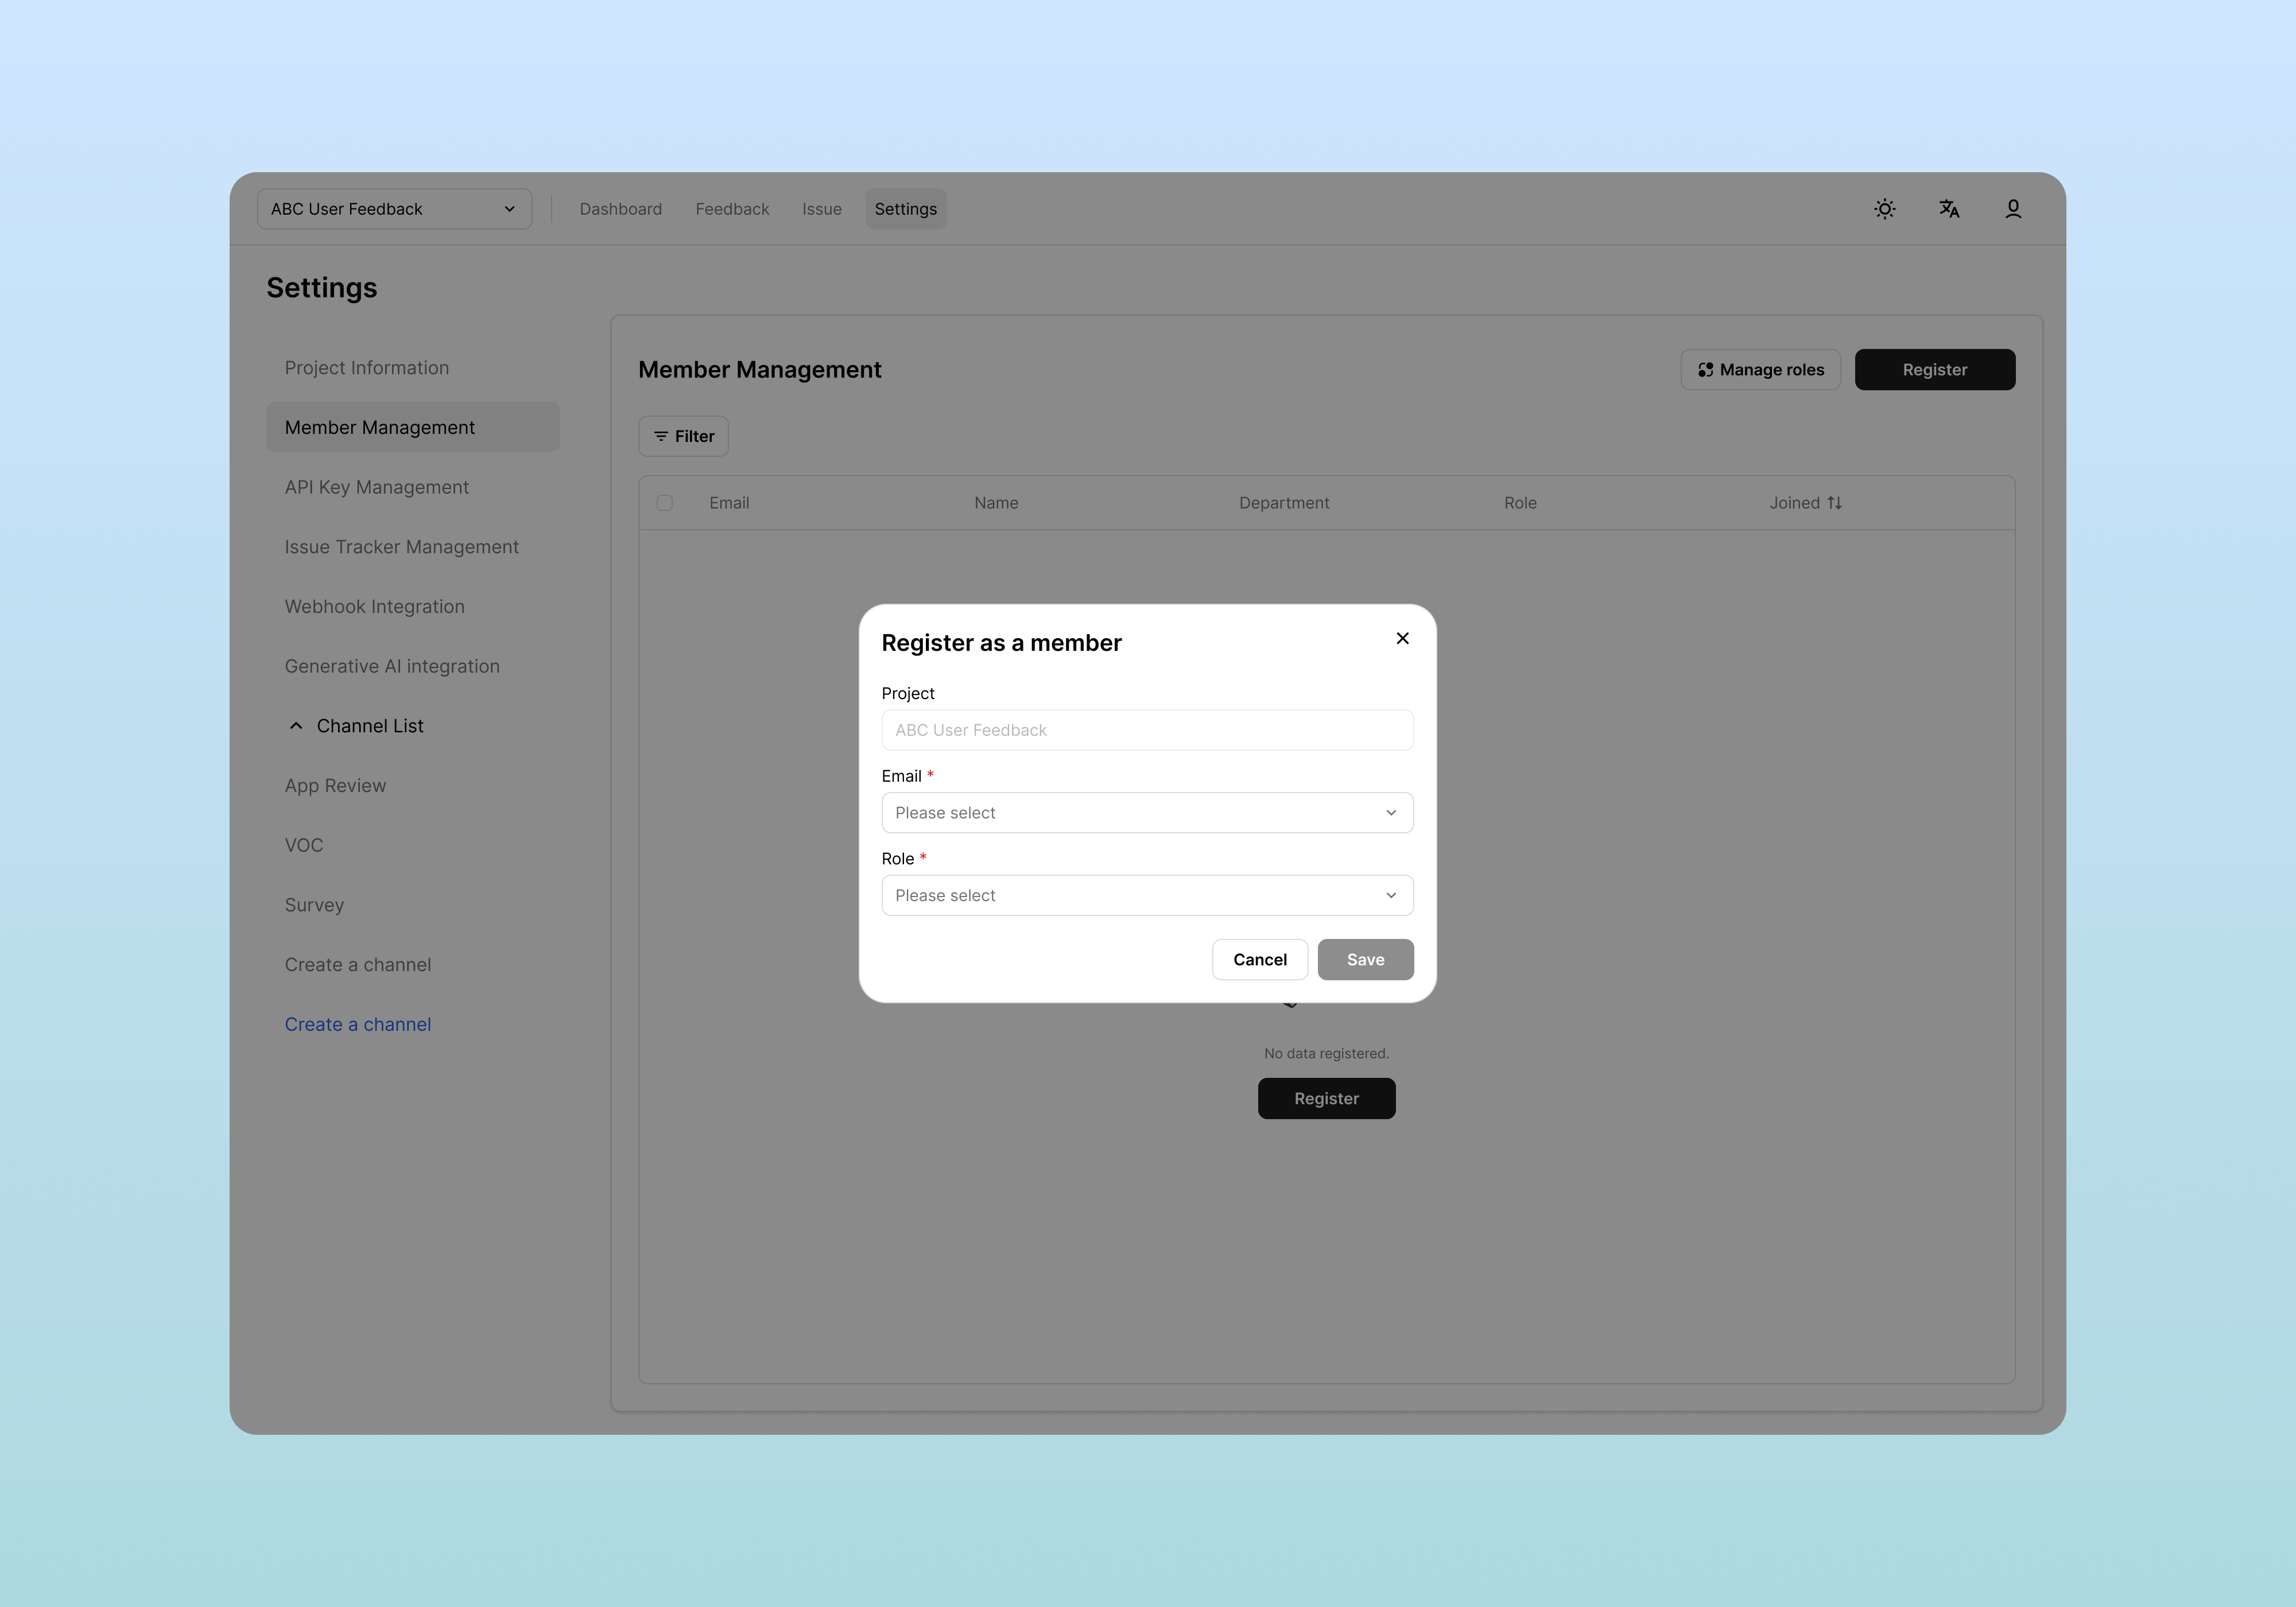
Invitation Procedure
- Click the Register Member button
- Enter invitation information:
| Item | Description |
|---|---|
| Email of the user to invite | |
| Role | Role to assign (Admin, Editor, Viewer, etc.) |
- Click the Invite button to complete the invitation
Editing Member Information
To modify existing member information:
- Click the row of the member you want to edit in the member list
- In the popup, you can modify the Role:
- Click the Save button to save changes
Removing Members
To remove a member from the project:
- Click the Delete button at the bottom of the member edit popup
- Click Confirm in the confirmation message
Removing a member does not delete feedback/issue records created by that user; only project access permissions are removed.
Role and Permission Management
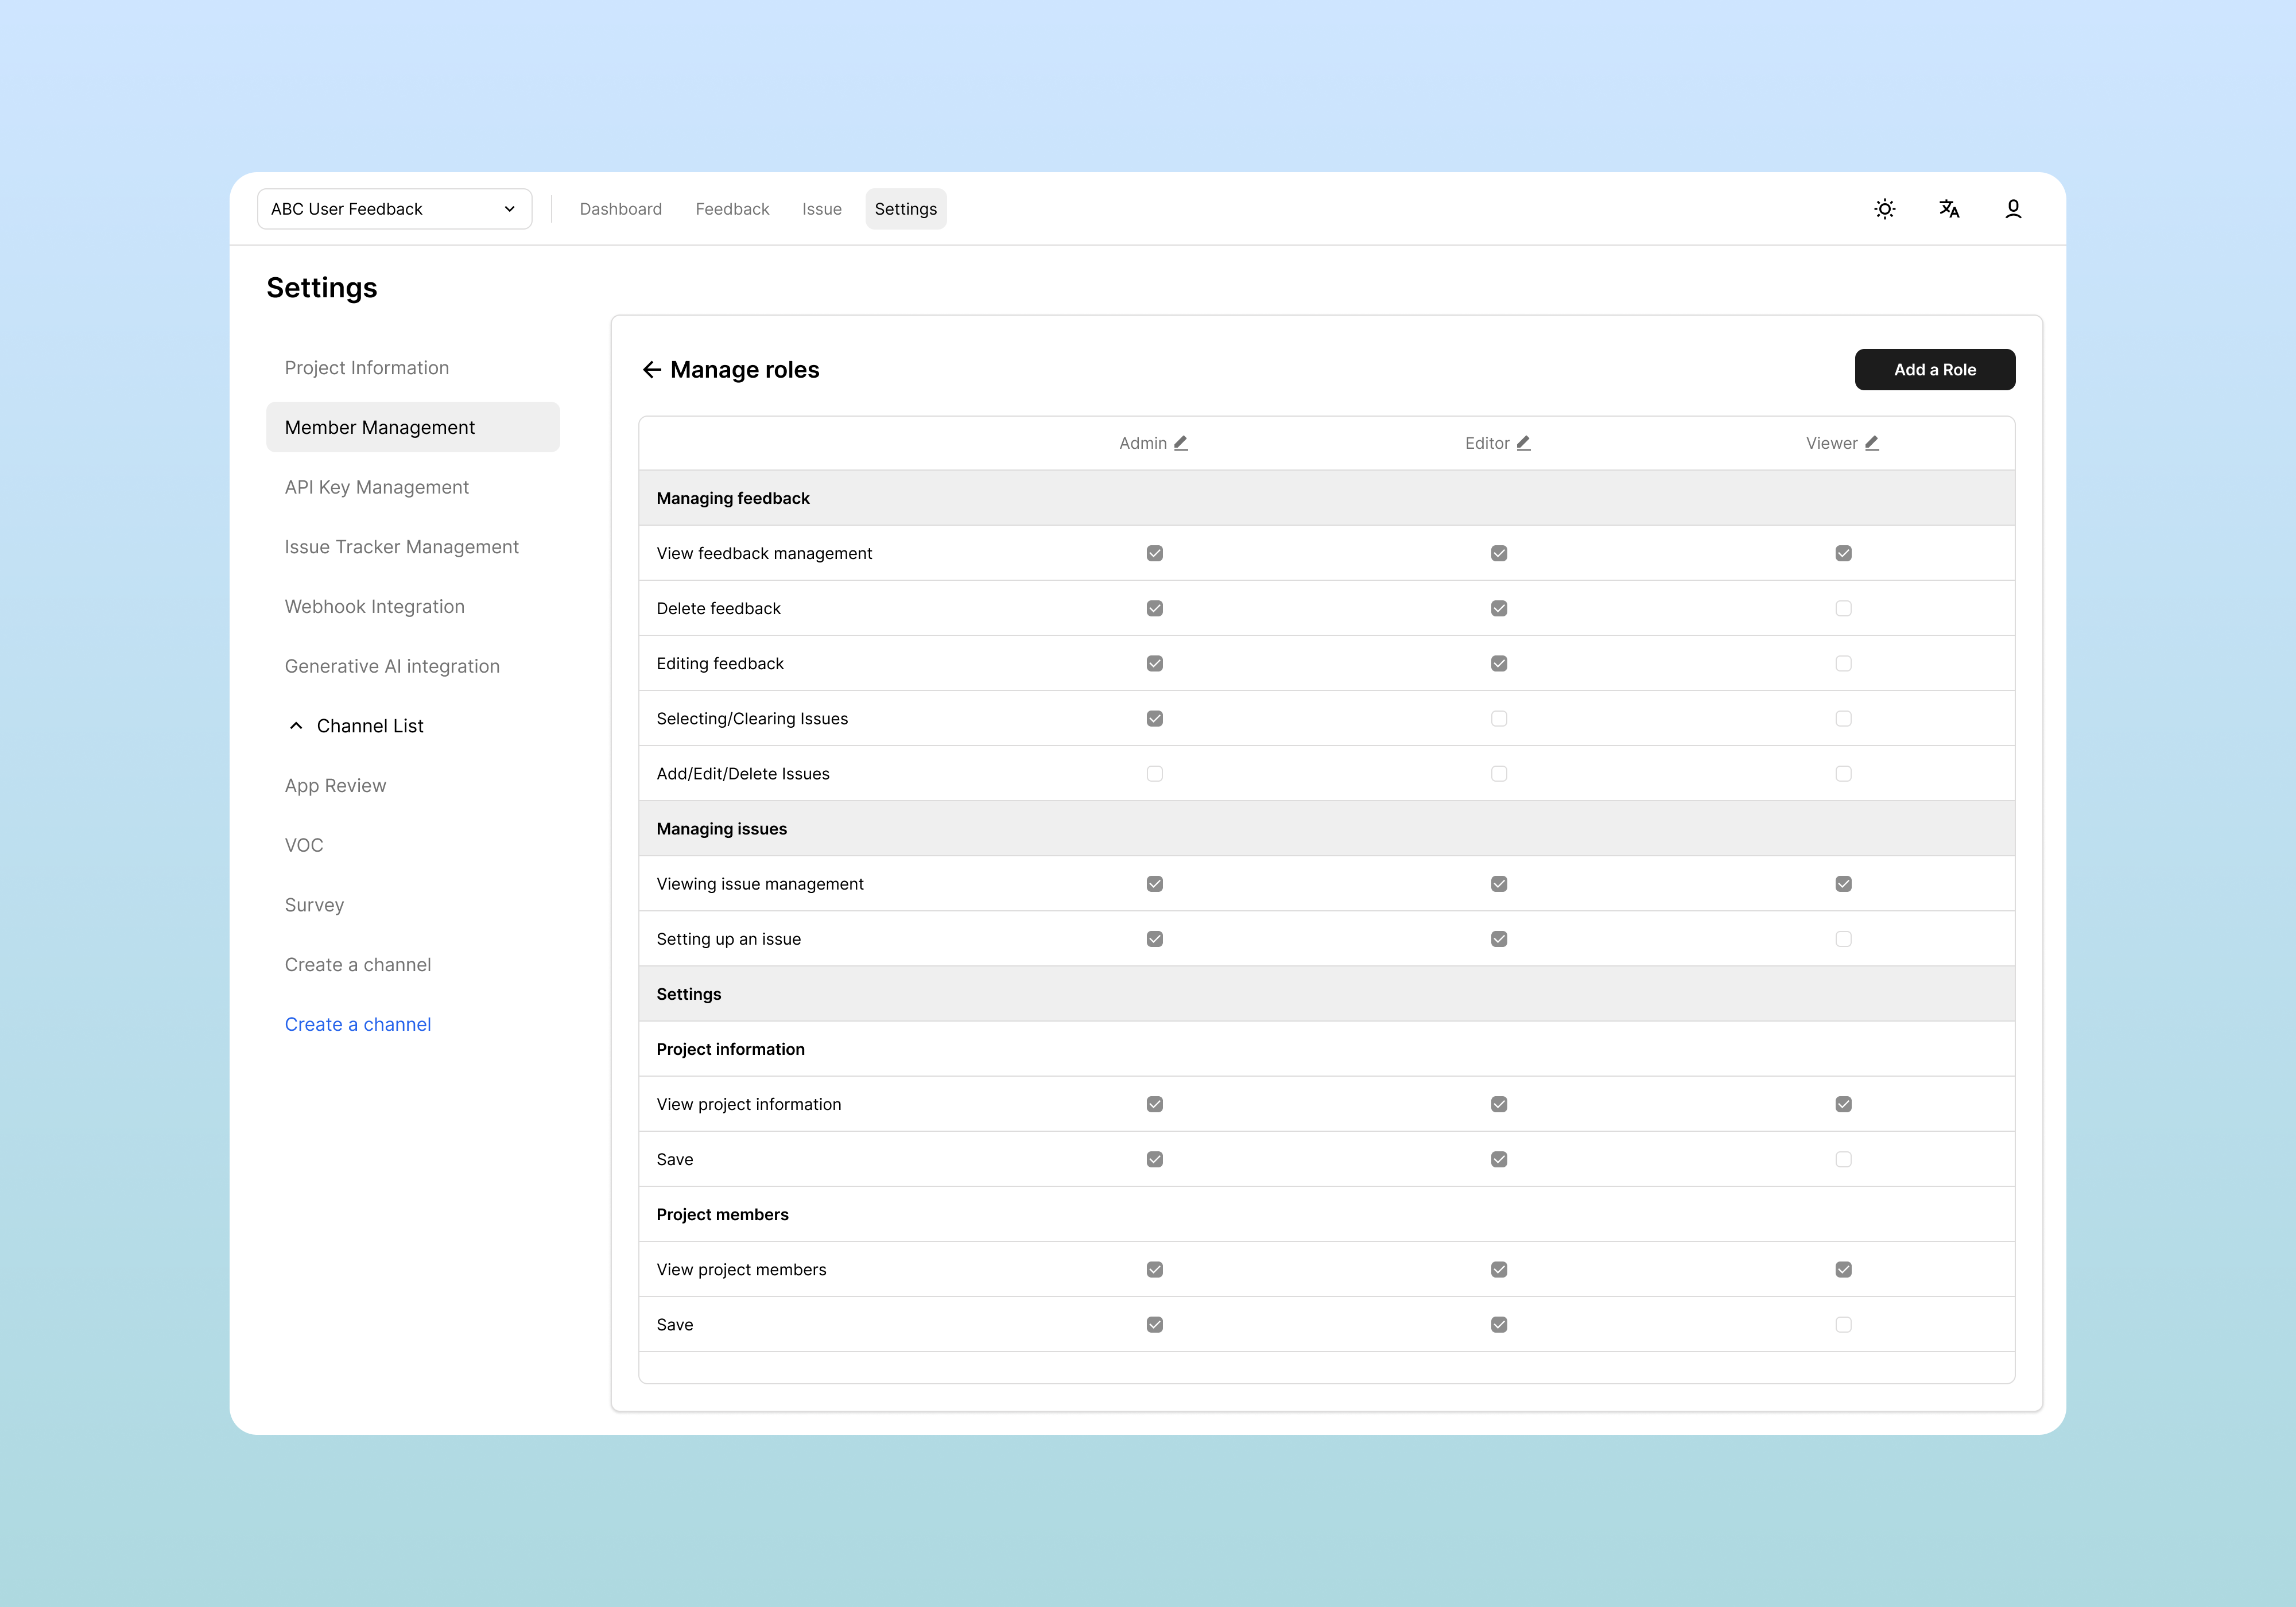
Default Roles
The system provides the following default roles:
| Role | Permission Summary |
|---|---|
| Admin | Access to all features. Includes project deletion |
| Editor | Can create, modify, and delete feedback/issues. Cannot access settings |
| Viewer | View only. Cannot modify, delete, or access settings |
Creating Custom Roles
You can create custom roles when more granular permissions are needed:
- Click the Role Management link in the Member Management screen
- Click the Create Role button
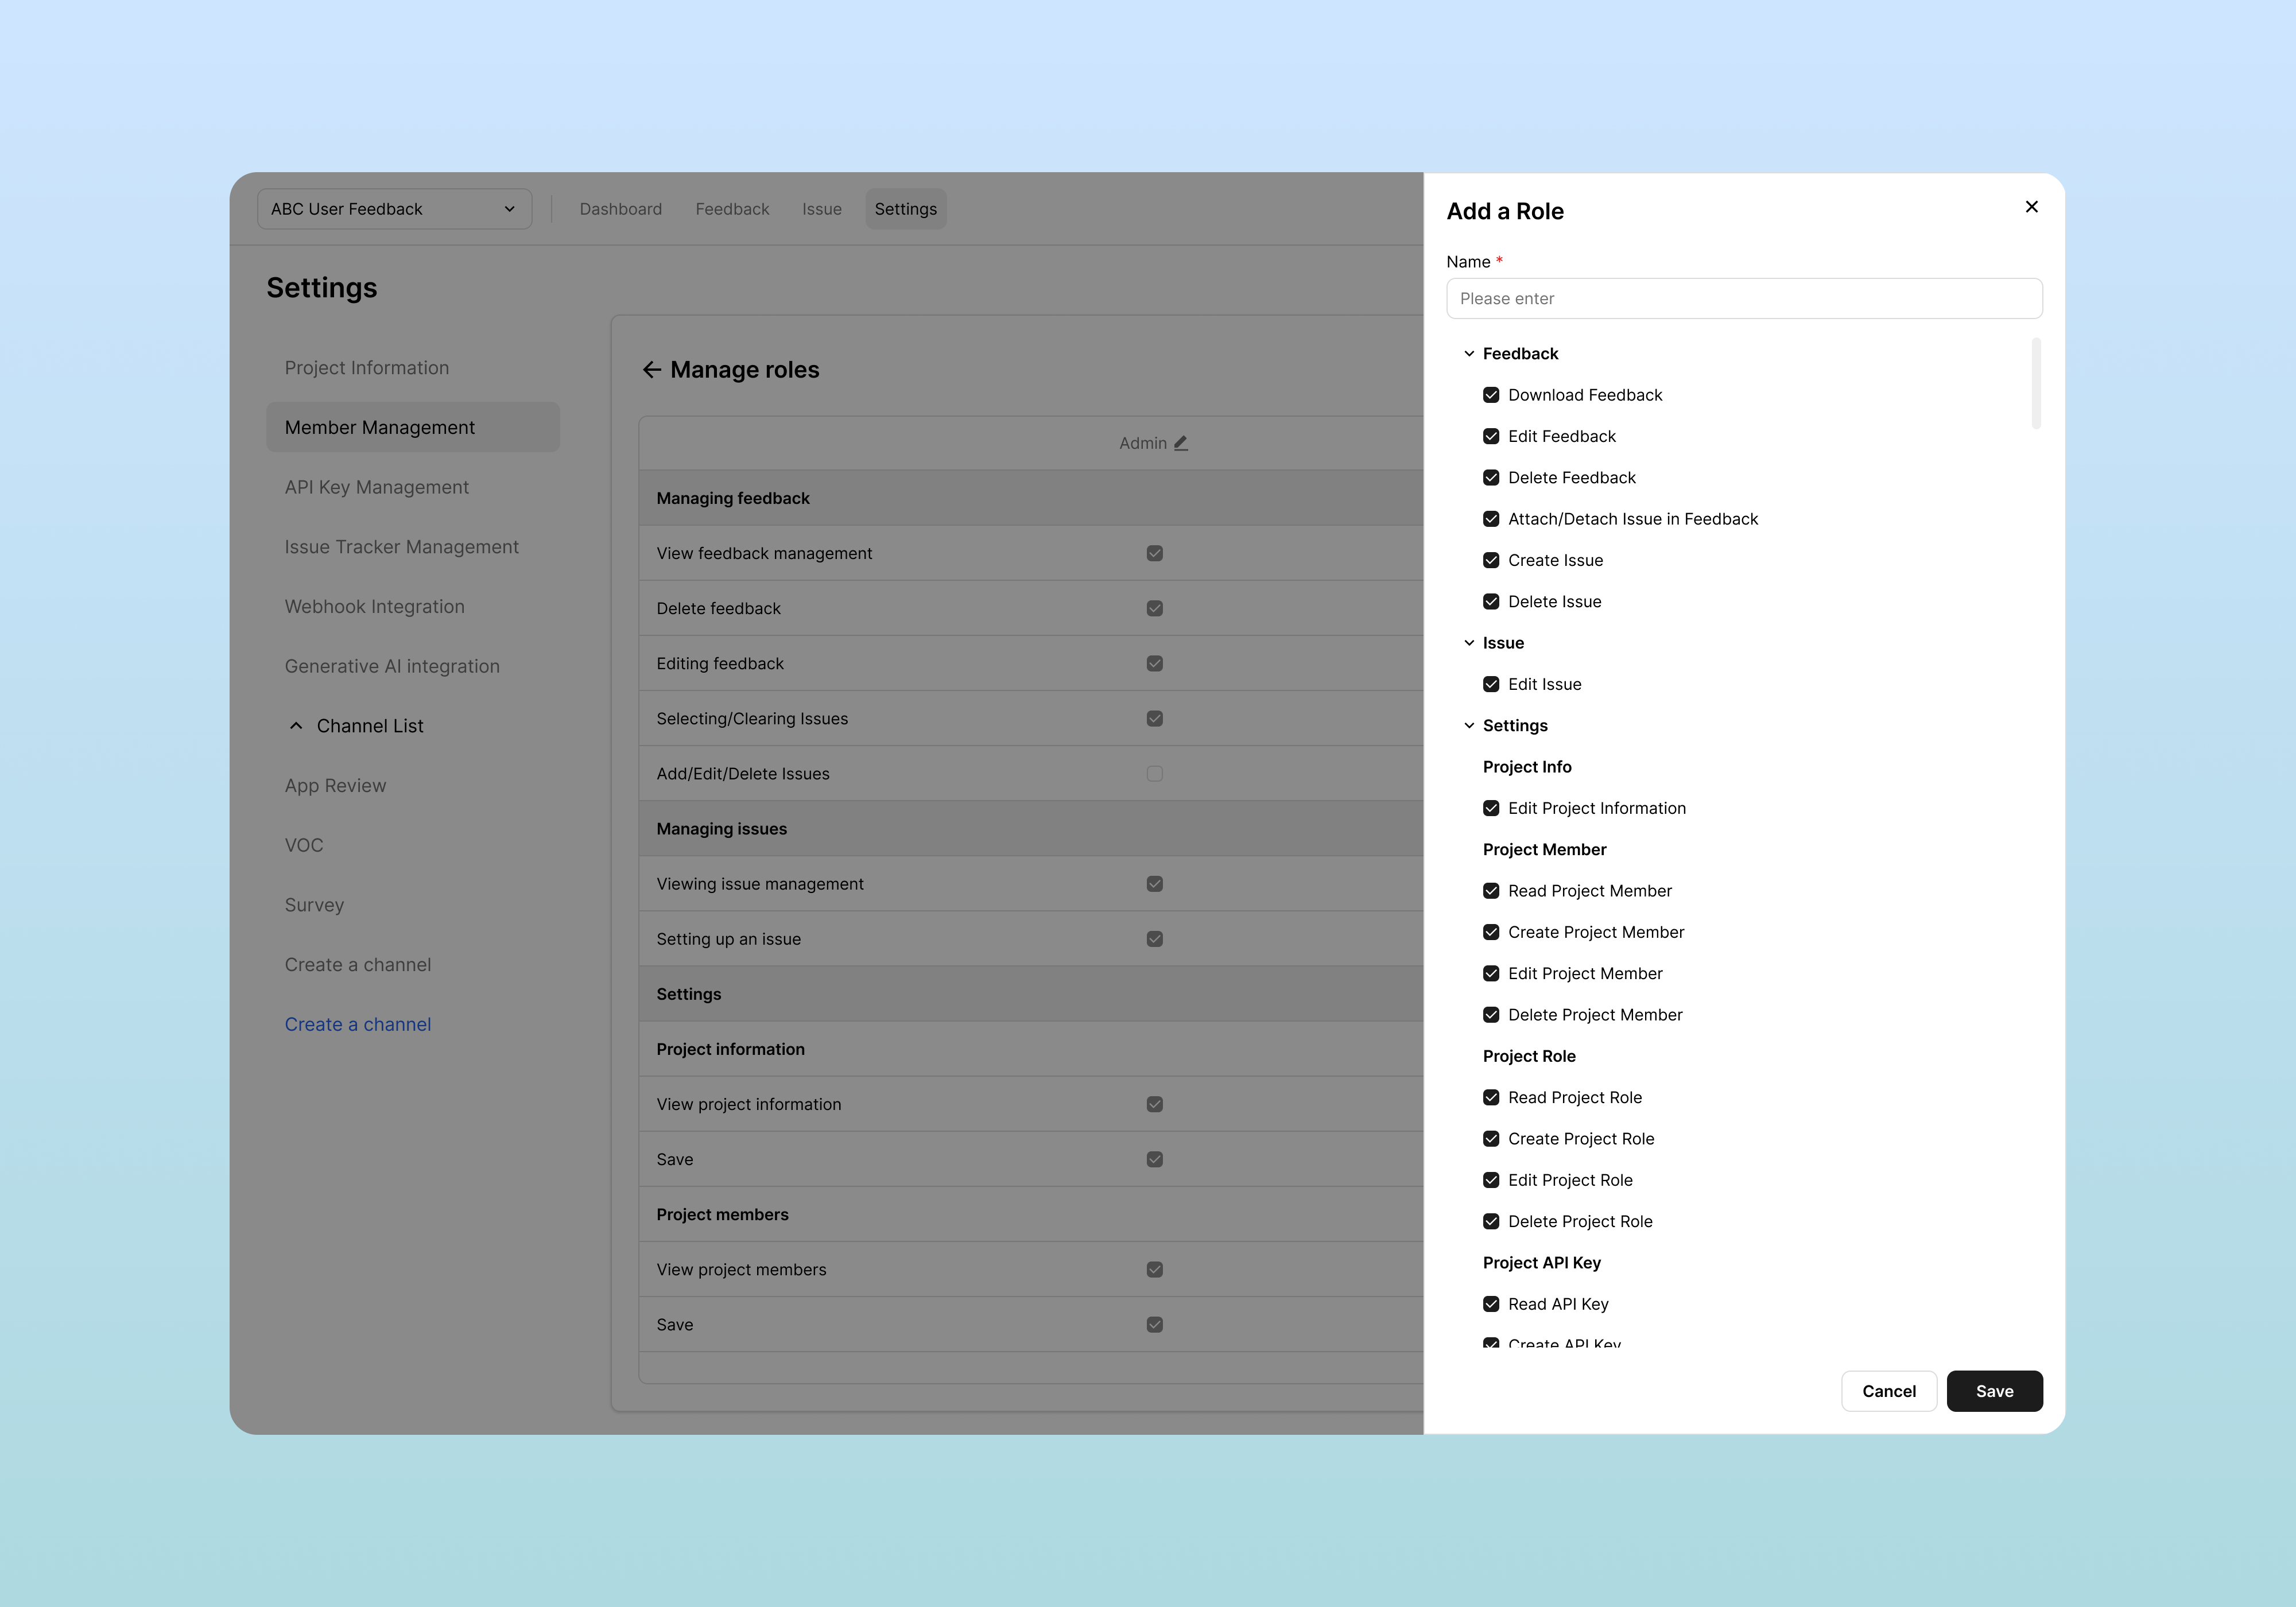
- Enter the role name and permissions:
Permission Settings
For each role, you can set the following feature-specific permissions:
Feedback Permissions
| Permission Item | Description |
|---|---|
| Download Feedback | Download feedback data |
| Edit Feedback | Edit feedback |
| Delete Feedback | Delete feedback |
| Attach/Detach Issue in Feedback | Link/unlink issues with feedback |
Issue Permissions
| Permission Item | Description |
|---|---|
| Create Issue | Create issues |
| Edit Issue | Edit issues |
| Delete Issue | Delete issues |
Project Management
| Permission Item | Description |
|---|---|
| Edit Project Info | Edit project information |
| Delete Project | Delete project |
Member Management
| Permission Item | Description |
|---|---|
| Read Project Member | View project members |
| Create Project Member | Invite project members |
| Edit Project Member | Edit project members |
| Delete Project Member | Remove project members |
Role Management
| Permission Item | Description |
|---|---|
| Read Project Role | View project roles |
| Create Project Role | Create project roles |
| Edit Project Role | Edit project roles |
| Delete Project Role | Delete project roles |
API Key Management
| Permission Item | Description |
|---|---|
| Read API Key | View API keys |
| Create API Key | Create API keys |
| Edit API Key | Edit API keys |
| Delete API Key | Delete API keys |
Issue Tracker
| Permission Item | Description |
|---|---|
| Read Issue Tracker | View issue tracker |
| Edit Issue Tracker | Configure issue tracker |
Webhook Management
| Permission Item | Description |
|---|---|
| Read Webhook | View webhooks |
| Create Webhook | Create webhooks |
| Edit Webhook | Edit webhooks |
| Delete Webhook | Delete webhooks |
AI and Channel Settings
| Permission Item | Description |
|---|---|
| Read Generative AI | View AI settings |
| Edit Generative AI | Edit AI settings |
Channel-Related Settings
| Permission Item | Description |
|---|---|
| Edit Channel Info | Edit channel information |
| Delete Channel | Delete channel |
| Read Field | View fields |
| Edit Field | Edit fields |
| Read Image Setting | View image settings |
| Edit Image Setting | Edit image settings |
| Create Channel | Create new channels |
Permission Setting Tips
Security Best Practices
- Principle of least privilege: Grant only the minimum permissions necessary for work
- Regular review: Check permissions when team changes or employees leave
- Limit Admin role: Keep the number of administrators as small as possible
Editing and Deleting Roles
- Edit: Click the desired item in the role list to modify the name and permissions
- Delete: Roles not in use can be deleted with the Delete button
Note: At least one Admin role must always exist and cannot be deleted.
Related Documents
- Channel Management - Channel creation and field settings
- Feedback Management - Feedback collection and analysis
- API Integration - API key usage